Webhooks 🌐
Webhooks offer a powerful mechanism to receive real-time notifications of events like incoming SMS messages. This integration guide will walk you through setting up webhooks to receive such notifications directly from your device.
Supported Events 📩
-
 sms:received
messageId: Content-based IDmessage: SMS contentphoneNumber: Sender's numbersimNumber: SIM index (nullable)receivedAt: Local timestamp
-
 sms:sent
messageId: Unique IDphoneNumber: RecipientsimNumber: SIM index (nullable)sentAt: Local timestamp
-
 sms:delivered
messageId: Unique IDphoneNumber: RecipientsimNumber: SIM index (nullable)deliveredAt: Local timestamp
-
 sms:failed
messageId: Unique IDphoneNumber: RecipientsimNumber: SIM index (nullable)reason: Error detailsfailedAt: Local timestamp
-
 system:ping
health: Healthcheck status
Prerequisites ✅
Before you begin, ensure the following:
- ⚠️ You have SMS Gateway for Android™ installed on your device in Local, Cloud, or Private mode.
- 🔒 You have a server with a valid SSL certificate to securely receive HTTPS requests. You can use project's certificate authority (CA) to generate a valid certificate for IP addresses. Alternatively, use services like ngrok to generate a public HTTPS endpoint.
- 🌐 Your device has access to your server. If you operate entirely within your local network without Internet access, please see FAQ
Step-by-Step Integration 📋
Step 1: Set Up Your Server 🖥️
For your webhooks to work, you need an HTTP server capable of handling HTTPS POST requests. This server will be the endpoint for the incoming webhook data.
- Production: Use a valid SSL certificate.
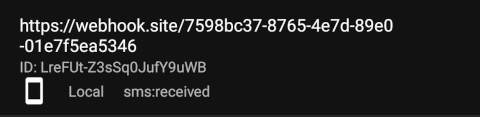
- Testing: Tools like webhook.site provide temporary endpoints to capture payloads.
Step 2: Register Your Webhook Endpoint 📝
To start receiving webhook notifications, you must register your webhook endpoint with the device. Utilize the curl command to send a POST request to the appropriate address, depending on whether you're in Local, Cloud, or Private mode.
- Local mode: Use the device’s local IP and port (e.g.,
https://192.168.1.10:8080/webhooks). - Private mode: Use your server’s domain name or IP and port (e.g.,
https://your-server.com/3rdparty/v1/webhooks). - Cloud mode: Use
https://api.sms-gate.app/3rdparty/v1/webhooks.
curl -X POST -u <username>:<password> \
  -H "Content-Type: application/json" \
  -d '{ "url": "https://your-server.com/webhook", "event": "sms:received" }' \
  https://api.sms-gate.app/3rdparty/v1/webhooks
Replace:
<username>:<password>: Credentials from the Home tab of the app.https://your-server.com/webhook: The URL of your webhook endpoint.https://api.sms-gate.app/3rdparty/v1/webhooks: The appropriate URL for your mode.
In Cloud and Private modes, please allow some time for the webhooks list to synchronize with your device.
Multiple Events
Each webhook is registered for a single event. To listen for multiple events, register separate webhooks.
Step 3: Verify Your Webhook ✔️
You can verify that it has been successfully registered by executing the following curl command:
curl -X GET -u <username>:<password> \
  https://api.sms-gate.app/3rdparty/v1/webhooks
Separate Lists
Local mode and Cloud/Private mode maintain separate webhook lists. Use the corresponding API URL to view registrations.
- Open the SMS Gateway app 📱
- Navigate to Settings > Webhooks > Registered webhooks
- The list shows all configured webhooks with:
- Endpoint URL
- Webhook ID
- Event type
- Source (Local/Cloud)
You can copy the webhook ID by clicking on the row.
Step 4: Test the Webhook 🧪
- For
sms:received: Send an SMS to the device. - For
sms:sent/delivered/failed: Send an SMS from the app to trigger these events. - For
system:ping: Enable the ping feature in the app’s Settings > Ping.
Step 5: Receive the Payload 📤
Your server will receive a POST request with a payload like:
{
  "deviceId": "ffffffffceb0b1db0000018e937c815b",
  "event": "sms:received",
  "id": "Ey6ECgOkVVFjz3CL48B8C",
  "payload": {
    "messageId": "abc123",
    "message": "Android is always a sweet treat!",
    "phoneNumber": "6505551212",
    "simNumber": 1,
    "receivedAt": "2024-06-22T15:46:11.000+07:00"
  },
  "webhookId": "<unique-id>"
}
Timely Response
Your server must respond with a 2xx status within 30 seconds to prevent retries
Retry Policy
The app implements an exponential backoff retry strategy: it waits 10 seconds before the first retry, then 20 seconds, 40 seconds, and so on, doubling the interval each time. By default, the app will retry 14 times (approximately 2 days) before giving up. You can specify a custom retry count in the app's Settings > Webhooks.
Step 6: Deregister a Webhook 🗑️
If you no longer wish to receive webhook notifications, deregister your webhook with the following curl command:
curl -X DELETE -u <username>:<password> \
  'https://api.sms-gate.app/3rdparty/v1/webhooks/%3Cunique-id%3E'
Security Considerations 🔐
- Review Registered Webhooks Periodically: Regularly audit your webhooks to verify URLs are valid and guard against unauthorized or stale endpoints.
- Use HTTPS: Encrypts data in transit.
- Secure Your Endpoint: Protect your webhook endpoint against unauthorized access. For example, you can specify authorization key as query-parameter when registering the webhook.
- Rotate Credentials: Regularly update passwords.
Payload Signing 🔏
Webhook requests are signed with HMAC-SHA256 for verification. The device includes these headers:
X-Signature- Hexadecimal HMAC signatureX-Timestamp- Unix timestamp (seconds) used in signature generation
The signing key is randomly generated at first request and can be changed in Settings → Webhooks → Signing Key

Verification process:
- Get raw request body as received (before JSON parsing)
- Concatenate with
X-Timestampvalue - Compute HMAC-SHA256 using the signing key
- Compare result with
X-Signatureheader
package webhooks

import (
  "crypto/hmac"
  "crypto/sha256"
  "encoding/hex"
)

func VerifySignature(secretKey, payload, timestamp, signature string) bool {
  message := payload + timestamp
  mac := hmac.New(sha256.New, []byte(secretKey))
  mac.Write([]byte(message))
  expectedMAC := mac.Sum(nil)
  expectedSignature := hex.EncodeToString(expectedMAC)

  return hmac.Equal([]byte(expectedSignature), []byte(signature))
}
import hmac
import hashlib


def verify_signature(secret_key: str, payload: str, timestamp: str, signature: str) -> bool:
    message = (payload + timestamp).encode()
    expected_signature = hmac.new(secret_key.encode(), message, hashlib.sha256).hexdigest()
    return hmac.compare_digest(expected_signature, signature)
Best Practices
- Use constant-time comparison to prevent timing attacks.
- Validate timestamps (e.g., accept only timestamps within ±5 minutes) to prevent replay attacks.
- Store secret keys securely (e.g., environment variables, secure vaults).
Troubleshooting 🛠️
No Webhooks Received?
- Verify the webhook URL is correct
- Ensure the device can reach your server
- Verify SSL certificate validity
- Check device and server logs
- Test with webhook.site temporary endpoint
Signature Validation Issues
- Ensure timestamp is UTC Unix time in seconds
- Use raw body before JSON decoding
References 📚
Examples 💡
- Flask webhook processor: Demonstrates registration, HMAC validation, and payload handling with Flask.
- FastAPI webhook processor: Demonstrates registration, HMAC validation, and payload handling with FastAPI.
- Telegram Forwarder Function: Forwards SMS to Telegram using a cloud function.
- Web Client: Node.js client for sending/receiving SMS via Socket.io.